
Festive Holiday Breads: The Path of Yeast Assistance
By Anna Sachse
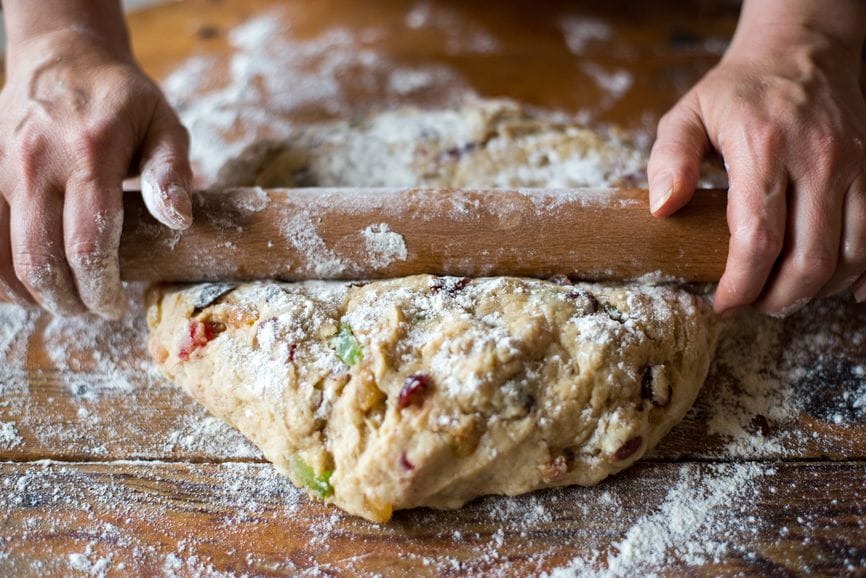
When the weather outside is frightful, homemade breads are truly delightful! And all that indoor time is the perfect opportunity to experiment with tasty recipes that use yeast—for me, winter always awakens memories of my mom’s dreamy cinnamon rolls (drenched in cream cheese frosting, of course) and her hearty molasses wheat bread slathered with butter and jam. You’ll need a pinch of patience to test your yeast first and to allow the dough to rise, but the overall process isn’t as complicated as you might think.
First-time bread baker? Check out this excellent yeast primer and this one, both from The Kitchn, and try to think about it as a journey rather than a destination: Even if your first attempt is less-than-perfect (for example, if you produce a brick-like loaf strong enough to fortify your home’s foundation), getting floury with your little one is truly the best part. And once you get the hang of bread-making, the airy, chewy deliciousness, which your kids will remember with big grins for many winters to come, is well worth the effort.
My baker-extraordinaire aunt has been making these scrumptious holiday dinner rolls for 30 years and now gets her grandchildren in on the action. Enjoy!
Aunt Diane’s Tried-and-True Holiday Refrigerator Dinner Rolls
*Makes 2.5 to 3 dozen
Ingredients:
- 5-6 cups unsifted, unbleached white flour (bread flour is also okay)
- 1/2 cup sugar
- 1 1/2 teaspoon salt
- 2 packages rapid rise yeast
- 1 cup milk
- 2/3 cup water
- 1/4 cup butter
- 2 eggs at room temperature
- Peanut oil for pan
- 2 oz. milk for brushing on rolls
Directions:
- Mix 2 cups of the flour with the sugar, salt, and yeast in a large bowl until combined. If you have a KitchenAid stand mixer, use the mixing attachment; otherwise, simply combine these dry ingredients by hand and then shift to a hand mixer if you have one for future steps. (And maybe if you’re very good, Santa will put a KitchenAid in your stocking.)
- Combine milk, water, and butter in a saucepan or microwave and heat until warm (120-130 degrees if you happen to have a thermometer). The butter doesn’t need to completely melt.
- Gradually add the wet ingredients to the dry and beat for 2 minutes at medium speed, occasionally scraping down the sides of the bowl. Add the eggs and 3/4 cup flour. Beat at high speed for 2 minutes, occasionally scraping the bowl. Stir in enough additional flour (not more than 6 cups total) to make a stiff dough.
If using your stand mixer, now is when you switch to the dough hook for the mechanized version of kneading. But don’t let terms like “dough hook” deflate your enthusiasm! Many bakers actually prefer hand-kneading anyway, as it literally provides a better feel for what’s going on with your dough. The ever-helpful Kitchn has this easy step-by-step video tutorial. Either way, knead the sticky dough about 8-10 minutes, until it becomes smooth, supple, and silky.
- Cover the dough with plastic wrap and then a towel. Let it rest for 20 minutes.
- Punch down the dough (note: it’s a more gentle process than it sounds) and then use it to make shapes: pan rolls, clover leaves (3 little balls stuck together), braids, etc. Creativity is good! Oil 2 large (9x13-inch glass or ceramic) baking pans with peanut oil. Place the rolls in the pans about 1/2-inch apart. Cover pans with plastic wrap and refrigerate for 2 to 24 hours.
- When ready to bake, preheat the oven to 375 degrees. Remove the pans from the refrigerator and let stand for 10 minutes. Brush with milk right before baking. Bake for 15-20 minutes, removing them from oven as soon as they turn a wonderful golden color.
Kiddos love hearing about the “yeast beasties” that become activated when exposed to moisture, heat, and sugar. Get them in on the measuring, pouring, egg-cracking if able, and shape-making.
Want more? Here are three more options that are guaranteed crowd-pleasers:
Challah
A glossy, golden braid or knot of rich and slightly sweet bread that pulls apart in pillow-soft pieces, challah is a staple of the Hanukkah dinner table but beloved by all who taste (and then devour) it. With minimal ingredients and a do-it-in-a-morning time frame, it’s also a great intro to yeast breads for busy parents and curious young cooks alike. This recipe from prolific cookbook author Joan Nathan for the New York Times makes it all look easy-peasy, while this version from The Kitchn is awash in bread beauty-shots and thorough how-to. If you’re raisin people, mix in a few handfuls during the kneading process.
Monkey Bread
Baked in a gooey brown sugar ’n’ cinnamon sauce and topped with a vanilla glaze, health food this is not. What it is: a delicious holiday breakfast treat that’s akin to a cinnamon roll multiplied by a thousand pounds of awesome. The kids can have some scrambled eggs and fruit salad, too, to alleviate your conscience (and potentially distract them while you indulge in seconds—or fourths). We love this made-from-scratch take by The Pioneer Woman; small hands will especially enjoy rolling balls of dough in cinnamon-sugar.
Whole Wheat Bread
With all the sweets that permeate the season, consider whipping up this simple whole-wheat bread from the Five Heart Home blog for a little nutritious balance. It’s perfect for your kiddos’ grilled cheese or peanut-butter-and-banana toast. We also like the looks of this super simple whole-grain loaf that included flax and sunflowers seeds from the Minimalist Baker.


