Best Homemade Play Dough: 3 No-Fail Recipes for Perfect DIY Dough
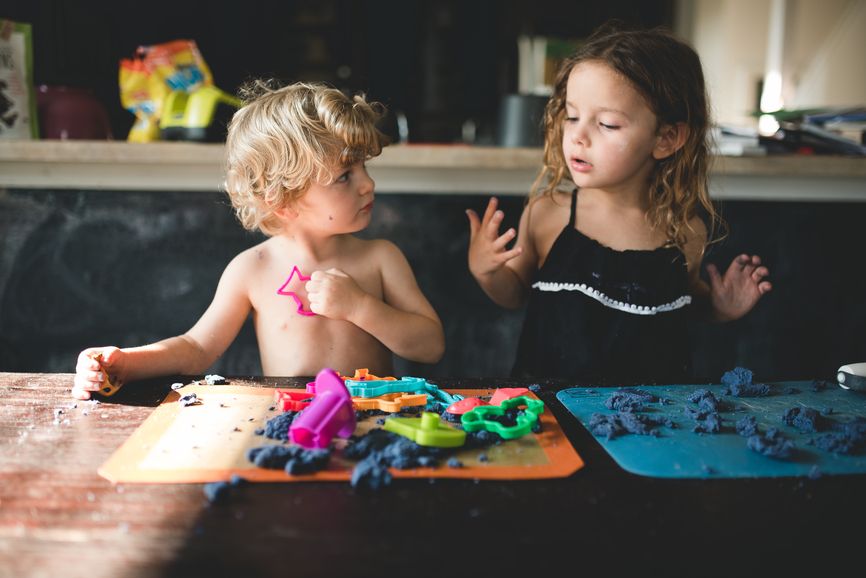
Playdough activities provide a fantastic sensory experience for kids that encourages imaginative play and creative expression, and guarantees hours (okay, at least 30 minutes) of fun. Stocking up on a rainbow of store-bought dough is a spend-y proposition, though—and many of the DIY playdough recipes you’ll find online yield dough that’s crumbly, sticky, or just a plain ol’ fail. How do we know? Because we’ve tried GOBS of online homemade playdough recipes ourselves in our search for the perfect one! And so, without further ado: Here are the very best homemade playdough recipes for your kids’ younger years, from us to you.
The Gold Standard of Playdough
We wanted a quick, easy-to-make recipe that produces a roll-able, foldable, moldable, non-toxic dough that doesn’t dry out too fast and can be saved for play on another rainy day.
The Takeaways
There wasn’t a huge difference between the final result of cooked and uncooked recipes, but there is one key ingredient you really need to use: cream of tartar, which was a common ingredient in all the recipes that worked well because it keeps DIY playdough from becoming a crumbly mess.
Other than that, we found that slight differences in ingredient quantities—more salt here, less flour here, baby oil instead of vegetable oil—didn’t create much variability in the final product, so feel free to give any alternatives you have a try!
The Classic: Stovetop Playdough
How to Make It (found here):
● 1 cup flour
● 1 cup water
● 2 teaspoons cream of tartar
● 1/3 cup salt
● 1 tablespoon vegetable oil
● Food coloring (optional)
In a medium-size pot, stir all ingredients (except the food coloring) together on the stove. Heat over low-medium and keep stirring until the mixture is smooth and begins to thicken. If you’re using it, add the food coloring. Keep stirring until the mixture starts to form a ball. Once the dough has come together, remove it from the pot and place on parchment paper, wax paper, or a plate to cool. Once it’s cool enough to handle, knead the dough for a few seconds until smooth.
Pros: A classic, no-fail recipe that will create a great ball of smooth dough every time.
Cons: Cooked entirely on the stove, which may cut down on the amount that kids can help.
The Verdict: You can’t go wrong with this one!
Baby-Oil Playdough
How to Make It:
● 1 cup flour
● 1/2 cup salt
● 2 teaspoons cream of tartar
● 1 cup water
● 1 tablespoon baby oil
● Food coloring (optional)
In a medium-size pot, stir all ingredients (except the food coloring) together on the stove. Heat over low-medium and keep stirring until the mixture is smooth and begins to thicken. If you’re using it, add the food coloring. Keep stirring until the mixture forms a ball. Once the dough has come together, remove from the pot and place on parchment paper, wax paper, or a plate to cool. Once it’s cool enough to handle, knead the dough for a few seconds until smooth.
Pros: This recipe keeps the dough—and kids’ hands—soft and smooth with the addition of baby oil. A light scent provides some extra sensory elements without being overpowering.
Cons: The extra salt in this recipe (compared to the classic recipe above) gives the dough a slightly grainier texture. Still requires stovetop time, and baby oil is less edible than the vegetable oil used in the first recipe.
The Verdict: For an especially soft and silky dough with a light scent, this is a fun variation—but stick with the classic recipe for everyday use.
No-Cook Playdough
How to Make It (recipe found here):
● 2 cups flour
● 2 tablespoons vegetable oil
● 1/2 cup salt
● 2 tablespoons cream of tartar
● Up to 1.5 cups boiling water (add a 1/2 cup at a time)
● Food coloring (optional)
While you wait for the water to boil, mix the flour, salt, cream of tartar, and oil in a large mixing bowl. If you’re using it, add food coloring to the boiling water, then stir into the dry ingredients (if you’re not coloring your dough, just add the boiling water). Stir continuously until it becomes a sticky ball of dough. Once the dough is cool enough to handle, remove onto wax paper, parchment paper, or a smooth surface and knead for a few minutes until no longer sticky.
Pros: This one does use boiling water, but you can stir the mixture on the kitchen table and let the kids get in on the arm-strengthening action once the water has cooled a bit. We were so surprised that this recipe came together as smoothly as the recipes that had us stirring at the stove for minutes at a time—definitely a plus!
Cons: Slightly less smooth and moldable than the classic recipe, but not by much. Requires more kneading time to get the perfect consistency.
The Verdict: This one is best for sharing cooking time with the kids, which is a major bonus. If you don’t want to dirty a cooking pot with sticky, glue-like dough, this version is your go-to.